Thursday, December 20, 2012

Kid Made Christmas Cards


Builder Boy made Christmas cards today! I got most of the ideas of Pinterest, and there were even more that we didn't try. Here are links to two blogs with links to a ton of kid-made Christmas cards. It's not to late to make cards for people if you're not mailing them.


Yes, we made tree or light themed cards. Not because we think that should be the focus of Christmas, but because they are the easiest for the kids to make.

The lights are thumbprints in the basic Crayola washable watercolors that comes in a bar. Builder Boy had trouble making the thumbprints; he kept clenching his thumb against his fist. He really likes making prints, though, so we'll try again sometime.(Here's the Pin for the original idea.) Learning opportunity/review: rainbow order.
This tree is made of pointer finger prints. The star and the tree stump are thumbprints. (Here's the Pin for the original idea.) Learning opportunity/review: plus one. Each row has one more print than the row above it.

 
I saw the idea on Pinterest to make the strips in the different colors, but now I can't find the Pin. Learning opportunity/review: smallest to biggest (or vice versa.)


The last tree we made, Builder Boy cut out three green triangles and then glued them on the paper and added drips from glitter pens I got from the dollar store. (The star is a sticker.)


Wednesday, December 19, 2012

Snowflakes for Sandy Hook

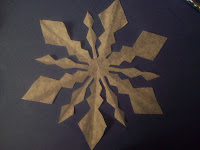
Jennifer Bardsley over at Teaching My Baby to Read posted about this. The National PTA and the Connecticut PTSA are trying to collect homemade snowflakes to decorate the Sandy Hook Elementary School for when the kids go back.
(It's suppose to be women and men and children holding hands.)

The address to send them too is:

Connecticut PTSA
60 Connolly Parkway
Building 12, Suite 103
Hamden, CT  06514

The due date is January 12, 2013

For more information and links to the websites for this go to Teaching My Baby to Read.

Here is the link for tips on how we made the coffee filter snowflakes for our tree.

Here are some Pins for snowflake patterns.

"Vintage" Snowflakes          Coffee Filter snowflake help     More Patterns     Even more patterns        

and some more patterns     Star Wars snowflake patterns

Tuesday, December 18, 2012

So, that's not good...

So on Sunday and again on Monday I had a sudden, horrible episode that my doctor thinks were extreme anxiety/panic attacks brought on by too much stress and things going on. So I dropped some "extra" things outside of the home (both attacks happened when I was trying to get myself and the boys out of the house in time for something.) I'm also enlisting my husband to help me with the Christmas presents I'm making for family members. I'll still take pictures of what I'm doing so I can blog the instructions, but I'm going to be posting less for the next two weeks.

I would appreciate prayers. This was really scary, and I didn't even think I was that stressed until I looked at all the little things adding up. Once Christmas is over, over half the things I'm worrying about will be gone, so I hope to get back to regular blogging after that (because I really love doing this!)

Mrs. Warde

Friday, December 14, 2012

Family Hand Print Portrait

So I got the idea for this on Pinterest (here's the original pin.) They embroidered it, I did it in paint. I made three for the ladies in Daddy's family as Christmas presents. I got a nice silver frame for each one at Walmart. I also got the felt there for $0.29 (the felt was cut to just a little bit too big) and I already had the paint. So an inexpensive, but priceless gift.

I traced my husband's hand with pencil and then covered the pencil with the dark blue paint. I used another awesome Pinterest idea: glue cap on a paint bottle to write with. It works perfectly! After his layer dried I did mine and then Builder Boy's and then Early Bird's.

I did the boy's layers today, and I posted about it today because of all the sadness of today, I wanted a good thing to look at and remember. Our prayers are with the families of Newtown, Connecticut, now and through what will probably be a very difficult Christmas.

Thursday, December 13, 2012

Builder Boy and Mama's Snap Circuit Adventure, Part 1

Okay, I couldn't wait any longer. I got Builder Boy Snap Circuits for his Christmas present. For those who've never heard of them they're like electronic Legos. You "snap" the pieces together and they create circuits that you can use to build electronic projects (one of them turns an alarm on if it detects water!)

Never mind that Builder Boy has never heard of circuits and doesn't really think that much about electricity (that I know of.) Never mind that this toy is labeled at 8+. This is what I got and this is what we're going to do together.

But last night as Daddy and I were...um..."testing" it out to make sure it all works I realized that this isn't going to mean much to Builder Boy without some background information.

So I looked up some information online (and I'll go to the library tonight) and we're going to spend this next week learning about electricity at a 1st grade level so that when we do these projects it will actually mean something.  An eHow.com articles gave this recommendation on teaching electricity to young kids:

  • "Use analogies that the child will understand. For example, explain that electricity is like a train on a train track, and that it requires the circuit to be continuous for the train to go all the way around. If the track/circuit is broken at any point, the train can't continue, and the circuit won't work. Using analogies will help children understand the basics of electricity."
The train analogy is perfect for a boy who's been playing with train tracks since he was two years old. I found a lot of really cool online resources and I will be sharing those on here as we use them.

_______________________________________________________________________________
I don't get paid for reviewing this product or any of the other electricity resources. All opinions are my own.

Monday, December 10, 2012

Another PVC Pipe Invention

"Brought to you by Builder Boy comes...the Leviticus! This wonderful musical instrument isn't just a stringed (okay, rubber-banded) instrument, but it's also a horn! (Or a plastic-wind.) The sturdy construction means that it can withstand the interest of a three-year-old! Available for a limited time only!"

Oops, you're too late. It's now something completely different. :)

Diaper Box Play Kitchen


Two years ago it was Builder Boy who was the one very interested in "cooking" and play food. So one day I used paper to turn a diaper box from Sam's into a play kitchen. It took maybe 30 minutes and he was thrilled. I made it look like our kitchen. All the paper was cosmetic, there were no "working" knobs. The paper was cheap construction paper that I glued/taped on. The top was laminated with clear packaging tape (I didn't know about contact paper at the time) to make it last longer.

It was perfect. He loved it. Then his friend who is a girl came to play and asked "where's the sink?" So that night I spent two hours making a sink. That barely got used by Builder Boy. But I wanted it to be a complete kitchen, so I made it.


I cut a hole in the box and attached a recessed box (we have a rectangular metal sink, so that was perfect) that I painted gray. The faucet was a prescription diaper cream box that I cut and then taped at an angle.

I am posting this for those who would like to make a play kitchen for their young children who do not have the time or money to make a wooden one.

Homemade Play Kitchen: The Plan

So here's the plan (because I love plans.) I am using these shelving units that I already had and wasn't using very much. (Considering the price, I would not have bought them specifically for this purpose.
They are laminated particle board which means I want to do as little drilling/screwing/hammering as possible. 

The pantry needs nothing added to it except for storage baskets. I will be adding two hooks on the side to hang the aprons. I found one at a thrift store and I'm going to make a no-sew apron with a place mat I got at the thrift store and some ribbon and Velcro.

I saw on Pinterest the idea to add baskets on the "refrigerator" door to make it look more real. I found a way to do that myself without making any holes so that is on and it looks good. I also found something I am going to see if I can make it work. If I can then I will have a magnetized area on the front of the fridge for play refrigerator.

I will be leaving the counter space clear instead of adding a sink like all the play kitchens I've seen. When I made a play kitchen out of diaper boxes a while back, they didn't even think of needing/wanting a sink until my friend's daughter came over to play and asked for one. If I put in a sink there will be no counter space to "cut" and prepare food. So that will remain as it is. I will however have a curtain under that part on a rod. I'll be using a hand towel and some ribbons and some sticky wall hooks to make it work.

The stove I'm just going to paint on the top. I don't think there is any room for temperature controls, even if I could think of a no-drill way to make them. That's the nice thing about having young boys: I don't think they're going to notice or think of all the details that "real" things have that this won't. This can be pretty simple and that (with their imagination) is all they need.

The oven is going to be the hardest part. I am probably going to need to install hardware, have a wood door (??) that's the right size and not rough on the edges. I know they probably won't notice if there isn't one, but it's something that I think should be there, and I'm going to try to make that happen.

We already have quite a bit of play food and dishes. I ordered some cool "cut" and "peel" Small World Living Fun-With-Fruit from Amazon, and I have a cool idea to make a play cookie baking set.

Keep checking in for the latest additions!

Saturday, December 8, 2012

Tissue Paper Ornaments /Sun-catchers


I was inspired by a few different projects on Pinterest and I decided to make these with the kids (and Daddy made some, too!) They will be stocking-stuffer gifts for our family this Christmas. We're also sending some in the mail.

First I cut out shapes for the borders of the ornaments. I chose stars, circles (mimicking ball ornaments) and trees.

Then everyone colored the borders (these could also be made with colored paper.)

Next we put the boarder (colored side down) on a piece of contact paper.

We put pieces of cut tissue paper in the sticky center.

After we had filled them out to what wanted them to look like we added another piece of contact paper on top, smoothing it out and getting rid of any air bubbles.

Lastly we cut around them (leaving some clear edge) and hole punched them to have a place to put the hook in.


Friday, December 7, 2012

The Grumpy Song

(Trying to get him to make a grumpy face)
A few months ago I invented the Grumpy Song. Early Bird was throwing a lot of tantrums with a lot of "no, no, no." He would say "no" to everything offered. He even said "no" to cake and cookies one time! I needed something to distract him and break the "no" to everything mindset. So to the tune of "If You're Happy and You Know It" I sang "If you're grumpy and you know it then say "no." At first he would keep saying "no" to the song. But once he figured out that he was participating in the song he changed it to "unh uhn" and "grrrr" and I changed along with him. After a few times through he started singing along with "If you're grumpy and you know it then your frown will surely show it." After a few more times he initiated "If you're happy and you know it." After that it only took a few more times through the happy version and he was ready to go and be good.

It took doing this with his tantrums a few weeks to a month, but now he somtimes starts it on his own, and it doesn't take more than 3 grumpy versions before he's ready to sing the happy song.

And it's really hard to sing "then your frown will surely show it" and make a big frown without smiling afterwards. :)


To the tune of "If You're Happy and You Know It"

If you're grumpy and you know it then say "no."
 If you're growing and you know it then your frown will surly show it,
If you're grumpy and you know it then say "no."

Thursday, December 6, 2012

Homemade Play Kitchen, Part 1

Shelves (left,) sink and stove (middle,) and refrigerator (right.)
Guess who's making a Pinterest inspired play kitchen for Christmas?! My friend gave me the idea, Pinterest is giving me the details, and I already had these in the closet being under-utilized.

Grade Levels in The Ordinary Parent's Guide to Teaching Reading

Earlier this year (these books did not come with what I got.)
Earlier this year (this book came with level 2.)


We are very happy with our reading curriculum, The Ordinary Parent's Guide to Teaching Reading by Jessie Wise and Sara Buffington. It can be all you need to teach someone to read from the very beginning with letter sounds to multi-syllable words at the fourth grade level. The grade levels, however, are not indicated in the book. It focuses on ability level, not comparing to public school standards. But it still would be nice to know what level your child is on. (If you know of a website the give an assessment test for free, please post a comment so I can share.)

I got all levels of Hooked on Phonics Deluxe version (the "old" 5 level version) at a yard sale a few years ago for only $25! I didn't use it as my primary teaching tool for Builder Boy, but it was good to have the leveled, phonic based readers for him to read and practice with. Using the HOP workbooks as a guide, I wrote down all the blends and teams from OPGTR (up to lesson 134) and HOP (all 5 of the 'old' levels) and synced them like I did with the K level OPGTR, HOP, and Bob Books.

Here is what I came up with, and what I think is a good guide of what grade levels the first 15 out of 25 sections (134/231 lessons) of The Ordinary Parent's Guide to Teaching Reading are.


Kindergarten: HOP K level covers CVC words and a few sight words. That's OPG up to lesson 40 (sections 1-3.)

First grade: HOP Levels 2 & 3 (orange and red) are suppose to be 1st grade. Both deal mostly with consonant blends and some digraphs, OPG  lessons 41-63 (sections 4 & 5.)

Level 2 covers the beginning blends (lessons 50-52, section 4) and some of the Consonant Digraphs found in section 5 of OPGTR.

Level 3 covers the ending blends (lessons 41-48, section 4.)

Second Grade: HOP Levels 4 & 5 (green and blue) are suppose to be 2nd grade. This is where things get more complicated.

Level 4 covers:
  • Long Vowel, Silent-E words (OPGTR section 7) 
  • some of the Common Spellings for long vowel sounds A, E, I, and O (sections 9-12)
  • Y=/e/ (lesson 200, section 20)
  • the basic R-Changed Vowels (section 16)
  • -all (lesson 118, section 13)
Level 4 covers R-changed vowels, which is started in lesson 154 of OPG (section 16), but they don't cover most of OPG's section 15 (Silent letters.) HOP also introduces compound words in level 4, when OPG doesn't until Section 17.

Level 5 covers:
  • some of the Common Spellings for the Other Vowel Sounds (OPGTR section 13)
  • igh=/i/ (lesson 134, section 15)
  • shr (lesson 55, section 5)
  • str, scr, spr, spl (lesson 63 and 64, section 6)
  • squ (lesson 53, section 4)
  • kn, wr (lessons 146 and 154, section 15)
  • soft c, soft g (lessons 77-79, section 7)

Level 5 mostly covers some common spellings for vowel sounds and then skips around in a seemingly random fashion (or at least in a pattern I personally am unable to decipher) adding a few more letter combinations to finish out the program. 

Gaps in HOP that OPGTR cover: HOP Level 4 skips Long Vowel U with the Silent-E (section 7) and teaches short words with long vowels (like be, so, etc.) as sight words through out the levels with no explanation. Only a few of the Common Spellings for Long Vowel sounds A, E, I, and O (sections 9-11) are covered, while U (section 12) is ignored.Common Spellings for Other Vowel Sounds are only about half covered (section 13.) Other Spellings for Short-Vowel Sounds (section 14) is completely ignored, and only 3 out of 20 of the Silent Letters (section 15) are taught.

I would consider anything in OPG Lesson 134 (section 15) and up to be 3rd and 4th grade.


Overall I consider OPGTR to be much more thorough and a better foundation for further reading than HOP. It also explains the rules and the whys of reading, where the HOP workbooks merely present the sound and the words that use it. In my option HOP is much more suited as a supplement to children attending a brick and mortar school rather than a stand alone program. This only applies to the "old" version. I do not know what changes they have made in their "new" books. (If you do have the "new" version and would like to share your experience with it, please comment. I would love to hear about it.)

For a more precise comparison please refer to the chart below. 

*The below chart is missing the red level comparison. The chart will be downloadable once I find the red level workbook and input the data.*

 
HOP OPGTR


Level 2 (orange)

Level 4 (green)

Level 5 (blue)
ch 57
a_e 65, 66
oy=/oi/ 122
th, th 59, 60
i_e 69
oi=/oi/ 123
sh 55, 56
o_e 71
ou=/ou/ 121
wh 61
u_e 74
ow=/ou/ 120
sm, sn, sp, sl, 51
e_e 67
au=/ô/ 117
sc, sk, sw, st

ee=/ē/ 89
aw=/ô/ 116
fl, gl, cl, bl, pl 50
ea=/ē/ 90
oo=/ōo/ 106
gr, fr, br, cr, pr,

ow=/ō/ 99
oo=/ŏo/ 113
dr, tr 52
oa=/ō/ 98
igh 134
qu 18 (Q)
ai=/ā/ 84
ind


ay=/ā/ 86
shr 55
Level 3 (red)

y=/ī/ 95
str, scr, spr, 63, 64


y=/ē/ 200
spl


ar 154, 156
squ 53


er 168
kn 154


ir 169
wr 146


ur 170
soft c, g 77-79


or, ore 157, 158


eer 175


ear 166


are 163, 164


air 165


all


________________________________________________________________________________
The links above from Peace Hill Press and Hooked on Phonics are linked to those companies' pages;  the pictures are a link to the Amazon listings.


The Hooked on Phonics picture link is to what I purchased at the garage sale, not what is currently offered by HOP. I have no knowledge of their "new" sets, though I have heard that the concepts and levels are pretty much the same.

I don't get paid for my reviews, and all opinions and conclusions are my own.

Tuesday, December 4, 2012

OPGTR, HOP, and BOB Books Mashup

When I was first teaching Builder Boy to read I used The Ordinary Parent's Guide to Teaching Reading and I used Hooked on Phonics books and Bob Books for him to have "real books" for him to read. To prevent confusion and frustration I did not want him to read a HOP or a Bob book that had words that Builder Boy had not learned yet. So I went through the 5 HOP books that came with the (old) K level and the first set of Bob Books and wrote down the words in each lesson of OPGTR and each new word in the books and I synced them (because I'm weird like that.) I thought there was a chance that someone out there might be interested in this information, so here it is.

These are all the lessons that are considered to be Kindergarten Level.

In color coded list format and a printable spreadsheet version (I don't know how to share files, so the chart is a jpg.)

OPGTR
          Lesson: 27: at, am, an, ad
          Lesson 28: -at words
             BOB Book Mat (with the extra word "on" that is not taught until OPGTR lesson 37.)
          Lesson 29: -an words, sight word "the"
             HOP Cat (with -ap words that are not taught in OPGTR, and the extra word "on.")
          Lesson 30: -ad words
            HOP Rag (with -ag words that are not taught in OPGTR, and the sight word "and" which is not taught in the first 40 lessons of OPGTR.)
          Lesson 31: -am words, sight word "I"
            BOB Book Sam (with the sight words "and" and "OK.")
          Lesson 32: -ed, -et words
          Lesson 33: -en words, sight word "yes"
          Lesson 34: -in, -it words
          Lesson 35: -if, -ib, -im, -ix, -ig, -ib, -id words
          Lesson 36: "s" as /z/: is, his, as, has, sight word "a"
            HOP Pig Wig
                     Pig Wig Can Hit
                     Tag (with sight word "to" which is not taught in the first 40 lessons of OPGTR.)
          Lesson 37: -ox, -on, -ot words
          Lesson 38: -og, -op words
            BOB Book Dot
                               Mac
                               Dot and Mit
                               Dot and the Dog
                               Jig and Mag
          Lesson 39: -up, -us, -ug, -um, -ut, -up, -ud, -um
            BOB Book Muff and Ruff (with -uff words that are not taught in the first 40 lessons of OPGTR, and the sight word "to.")
          Lesson 40: Review
            BOB Book Peg and Ted (with the extra words "pink" and "went.")
                               10 Cut-Ups
                               Lad and the Fat Cat (with an -eg word that is not taught in OPGTR.)
                               The Vet (with extra words "with," "into," and "zoo.")


________________________________________________________________________________
The links above from Peace Hill Press and Hooked on Phonics are linked to those companies' pages;  the pictures are a link to the Amazon listings.


A theological discussion sparked by...handwriting?

In today's handwriting lesson Builder Boy was to copy the sentence "Do you like dinosaurs?" Immediately Builder Boy started talking about dinosaurs and how they used to live but they died and turned into skeletons that people now dig up. Then he told me that dinosaurs came from another world.

Huh?

That started a discussion of God (that He made the dinosaurs a long, long time ago) which, thanks to recent readings, led to a discussion of heaven. I had to once more explain that we can't get to heaven by traveling (he asked how many days it took to get there.) He told me that we can't see God now, but we will see Him when we get to heaven. Then we talked a little bit more about heaven; what we think we'll do there, who we'll see there, and how people who love Jesus will go to heaven.

I am so glad that he encountered that handwriting assignment at home instead of at a public school. Not only would he have not been able to have a one-on-one discussion with a teacher at a public school, but other kids may have re-enforced incorrect information. And they aren't allowed to talk about God. So yea for homeschooling!

Monday, December 3, 2012

M is for Marshmallows and Mugs Math


We had hot cocoa today and it got me thinking of a fun way to review math. We still have some leftover mini-marshmallows from our shooters, so we did math with them! I thought about using real mugs, but I thought those would be harder for the kid to see, so I found a print out of a mug at freestockphontos.biz.

Counting:
I gave Early Bird 8 marshmallows to count and I gave Builder Boy a handful. (I forgot to have him guess/estimate before counting.) We are using Right Start Math, so instead of counting them all, he put them in lines of 5, two lines together to make 10, and figured out that he had 20 without having to count them.

Adding: "How many marshmallow are there if you put Builder Boy's and Early Bird's mugs together?"

Subtracting: This was fun. Say the number you have in your cup, and then eat some and say how many you have left! :) Good for taking away 1 at a time and counting down.

Sharing Fairly (dividing evenly): Start with marshmallows in the big mug. Take turns taking some for each kid's mug to divide them evenly. Practices "even" and "fair." Then have kids take turns splitting the marshmallows themselves. Divide some unevenly/unfairly and have them decide who needs to share how many to make it fair. Also start with an odd number and have them decide what to do with the leftover marshmallows.

Multiplying Practice: Put the same number in each mug (you can print more than 2 mugs for harder problems) and figure out what the answer is.

(This is the point where Early Bird was done and ate his marshmallows and went and played with other things.)
 

Making 5: Right Start Math has kids practice dividing 5 with a whole-to-parts circles. We did it with our mugs.


Mystery Mug with 10: Right Start Math has kids learn numbers as quantities and numbers as 5 + n for 6 through 10. Builder Boy and I played "Mystery Mug." I told him that there were 10 marshmallows, put some on his mug, and he had to tell me how many were in my (real) mug. (This also counts as subtraction from 10, and could be done with other numbers.)

Math is fun!

Clay Christmas Decorations


With this year's theme being white, and not having as many white ball ornaments as I wanted, I thought it would be a good idea to make cornstarch and baking soda ornaments. I had made the flour dough ornaments in the past and I did not like the way they came out. They were not smooth or even, and even with paint I wasn't very happy with them. When I saw some made with cornstarch on Pinterest (here's the pin) I thought that these would turn out better. I was hoping for smooth and shiny. That's not quite how they ended up.

Here are the instructions I got from the woodside kitchen blog. (My additions are in gray.)

1/2 cup cornstarch (1 cup)
1 cup baking soda (2 cups)
3/4 cup water (1 1/2 cups)
(The instructions said the recipe could be doubled, so that's what I did. Doubled measurements are in gray.)

Making Clay

In a medium sized pot combine the cornstarch, baking soda, and water. With an adults help the kids can stir this mixture over medium-low heat. After a couple of minutes, the mixture will begin to thicken. (This took longer than 10 minutes for me. I started at medium-low and kept having to up the temperature until it was medium. It also did not start to thicken until it was bubbling.) When it looks like smooth, mashed potatoes, remove the pot from the heat. Spoon the ball of dough into a bowl and cover it with a damp cloth until it's cool. When it's cool, knead it on a smooth surface, adding a little more cornstarch if it feels sticky.

Rolling, cutting, and baking
Dough on the wax paper


Preheat oven to 175 degrees. Line baking sheet with parchment paper. (Replace the parchment paper for each batch. Wax paper does not work well.) Roll out clay to 1/4 inch thick on a surface lightly dusted with cornstarch. (I found that rolling the dough on wax paper sprinkled with the cornstarch and folding the wax paper over the top as well made somewhat smoother ornaments that were easier to get up than on the counter.) Use cookie cutters to cut out shapes. Transfer shapes to the prepared baking sheet. Use a straw to poke a hole in the center top of each decoration, then get the kids to blow out the small piece of clay. They love this task! Place them in the oven at 175 degrees for about an hour, turning them over halfway through cooking. (50 minuets worked best for me.)

I tried adding indented details on a few
After baking and double glazing


When they didn't turn out shiny, I tried glazing them with 2 parts white glue to 1 part water. (I got that from SOTW AG:1) but it didn't seem to look very different. Not even when I did an extra coat after the first coat dried. I was really hoping for something that reflect the light, even just a little bit, but that was not the case. The plain white paint that I have did not achieve that effect either.

Overall it adds very little to my tree behind the snowflakes, even with a double batch. It made enough for 3 batches (I have a small oven) which meant it took 4 hours between making, cooling, rolling and cutting, and baking time. But Builder Boy had fun helping me make them. That made it worth it. But I probably won't make these again unless the kids want something to make and paint. Food coloring can be added to the dough when you're cooking it if you want to color the batch.

Saturday, December 1, 2012

Paper Snowflakes


For my "filler" this year we made coffee filter snowflakes. It looks so beautiful! And because they are translucent the lights shine through for a soft effect. The whole family made snowflakes for the tree. I got some patterns of Pinterest links (here, and here) and a few I tried for a specific picture. Mostly we made our own, random cuts to see how they would turn out.

Snowman Snowflake

Christmas Tree Snowflake

A Snowflake Snowflake!


First Fold
Second Fold
To make the snowflakes:
  1. I took a coffee filter and folded it in half. 
  2. I counted the ridges and there were almost 15 even on one half. I used that to divide the half into thirds.
  3. I folded the first third over, and the last third under.
  4. (Optional) Sometimes I folded the filter already folded in thirds in half again, making it copy what you cut 6 times instead of just 3 times.

Draw first....
Things I Learned:

  • Pencils are your friend. If you want to do more than just random cuts to see what it makes (which is a lot of fun) then drawing it first on pencil is a good idea. It doesn't show up when you flip the finished snowflake over, so you don't have to worry about erasing it.


...then cut...

.... ta da!


  •  If you draw it you don't have to cut it all in one continuous piece. (That took me a few snowflakes to figure out.) The advantage of having it already drawn is that you can take out the parts you're going to cut out in more manageable chunks, which increases your angle of cutting options.
A filter folded in 6ths
  • If you want "spoked" snowflakes instead of circles, cut the "center" out.


Folded in 3rds, half boy on one side and half girl on other


Finished Tree

Related Posts Plugin for WordPress, Blogger...