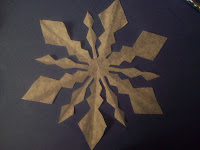
For my "filler" this year we made coffee filter snowflakes. It looks so beautiful! And because they are translucent the lights shine through for a soft effect. The whole family made snowflakes for the tree. I got some patterns of Pinterest links (here, and here) and a few I tried for a specific picture. Mostly we made our own, random cuts to see how they would turn out.
 |
| Snowman Snowflake |
 |
| Christmas Tree Snowflake |
 |
| A Snowflake Snowflake! |
 |
| First Fold |
 |
| Second Fold |
- I took a coffee filter and folded it in half.
- I counted the ridges and there were almost 15 even on one half. I used that to divide the half into thirds.
- I folded the first third over, and the last third under.
- (Optional) Sometimes I folded the filter already folded in thirds in half again, making it copy what you cut 6 times instead of just 3 times.
 |
| Draw first.... |
- Pencils are your friend. If you want to do more than just random cuts to see what it makes (which is a lot of fun) then drawing it first on pencil is a good idea. It doesn't show up when you flip the finished snowflake over, so you don't have to worry about erasing it.
 |
| ...then cut... |
 |
| .... ta da! |
- If you draw it you don't have to cut it all in one continuous piece. (That took me a few snowflakes to figure out.) The advantage of having it already drawn is that you can take out the parts you're going to cut out in more manageable chunks, which increases your angle of cutting options.
 |
| A filter folded in 6ths |
- If you want "spoked" snowflakes instead of circles, cut the "center" out.


 |
| Folded in 3rds, half boy on one side and half girl on other |
 |
| Finished Tree |


No comments:
Post a Comment