

Showing posts with label Art. Show all posts
Showing posts with label Art. Show all posts
Friday, August 14, 2015
Music and Art Appreciation: #1 Most Likely to Drop Subject
Part 5 (and last one!) of my series wrapping up what we learned this year in different
subjects and what each experience taught me about homeschooling in
general. (Part 1: History, Part 2: Science, Part 3: Math, Part 4: Language Arts.)


Monday, September 15, 2014
German Pancakes: Take Two
 For last week's Art Appreciation Tea Party I tried again to do the pancake fruit cups/German Pancakes that facebook used perfect pictures of to taunt me. I found the original recipe: check! No cheap shortcuts. I followed the instructions: check! Well, at least, I thought I had, but apparently using Pam on the muffin tins wasn't the same as "grease well." And the result?
Monday, September 8, 2014
Art Appreciation Tea Party

On Thursday afternoons we have added to our schedule an afternoon tea party at 3:00 at which we will absorb and discuss various forms of art. I can't claim credit for this idea; I've seen it on several blogs, though I don't remember which blog I first saw the idea on. However, I was immediately in love with the idea, but it has taken a few years to actually get to doing it.
Monday, February 10, 2014
Encouraging Creativity in Your Homeschool Through Arts and Crafts (Guest Post)

Now that I am a mother, I strive to encourage my own children to utilize the ideas and worlds locked away in their brains. I am blessed to be able to provide them with more tools than I had for this so I attempt to set up frequent times during our week where they are allowed to participate in both structured and unstructured crafting time.
I've heard parents that have similar desires to do this for their children, but either don't know where to begin or are scared of the mess that can accompany the creations. At Mrs. Warde's request, I will be sharing a few tips and suggestions based on how I do things in my home.
Supplies to Have Available

- construction paper
- glue bottles and glue sticks
- crayons
- colored pencils
- scissors (craft scissors are especially fun)
- markers
- stickers
- various doodads like craft gems, buttons, wiggly eyes, and beads
- pipe cleaners
- craft foam
There are other supplies that I usually have around like ribbon, bottle caps, craft sticks and other miscellaneous items. These are things that I save after their original use because I never know when they will be just the thing we need to add the finishing touch to our project. I organize all of our supplies in labeled bins for ease of use.
Moving on to actually getting our hands dirty...
Tips for Unstructured Craft Times
- Refrain from giving too many directives. Just provide the materials and let the children create without much guidance.
- Provide help if asked, but don't interject without a request to do so.
- Never criticize your child's creation.
- Don't worry about the mess. I repeat, don't worry about the mess. Safeguard the area with newspaper or an old sheet, but don't fret over the clean up. Creativity is often messy. Which would you rather remember? The time that your child made a robot with pipe cleaners and a cereal box just for Mommy or the time when you you had a conniption because there was playdough in the carpet? Messes can be cleaned. Memories are forever.

Tips for Structured Craft Times
- Choose activities that correspond to lessons or interests. Studying about horses? Make one out of clay. Learning about a specific country? Research and fine a related craft. Pinterest is full of ideas at your fingertips. You can also invest in or borrow craft books from your library.
- Craft with them. Children love to have their parents involved in activities with them. Roll up your sleeves and work alongside them!
- Don't worry about the mess. Read above.
- Don't be afraid to try new things. If something about your planned craft isn't working out, it's perfectly fine to adapt and change things to make something new. Go with the flow.
I also try to allow them to create whenever they ask unless there is something more pressing to be accomplished first. I don't want to squelch the desire. Imagination is key to a fun childhood!

Recommended Resources
- Global Art: Activities, Projects, and Inventions from Around the World by Mary Ann Kohl
- Kids Create: Arts and Crafts Experiences for 3 to 9 Year Olds by Laurie Winn Carlson
- Little Hands Celebrate America! Learning About the U.S.A. Through Crafts and Activities by Jill Frankel Hauser
- DLTK's Crafts for Kids
- Danielle's Place of Crafts and Activities
- Spoonful
- Make and Takes
Do you have utilize arts in crafts in your homeschool?
.jpg)
-- Dusty Blog: To the Moon and Back Facebook Twitter
Thursday, August 29, 2013
Workbook Review: Follow the Directions & Draw It All by Yourself!
 Last month I got paid another $11 from my Amazon affiliate links (thank you, everyone who purchased something on Amazon.com after clicking on one of my links!) Scholastic recently had another sale so I spent $10 on 10 ebook versions of their workbooks to enhance or add a different dimension to our school year. One workbook that we've already started is Follow the Directions & Draw It All by Yourself! I come from a family of artists (my great grandfather was a commercial artist, my great grand mother was an amazing painter, and my oldest brother is very talented.) I, however, did not get the accurate drawing gene. Despite an art class in middle school, I'm pretty terrible at it. It is not something I can teach my kids to do on my own, so I was very happy when I saw this workbook.
What I liked best about the idea of this workbook was of the kids following the directions on their own. There is no reading involved; rather they have to use inference to determine from the example pictures what need to be added with each step. There are teacher instructions that can be given verbally, as well as expansion activity ideas for each picture. I'm not using those. What I have been doing for a week now is to print out a copy for each boy and put it on the table for them to find in the morning. Then, when they come down and get themselves breakfast they also have this activity that they have to figure out on their own. It started out with simple apples and balloons and has progressed to a ladybug today and will get more and more complex as they progress through the 25 pictures.
 |
| Builder Boy's ladybug on the left, Early Bird's on the right. |
When we are finished with this book I am going to start them on another following directions workbook that I got at the same time; that workbook contains written instructions, so it will be interesting to see how it turns out.

Thursday, May 16, 2013
Product Review: Paint Porcelain Party
 This was my Mother's Day present. Last year we lived very near a paint-your-own-pottery place, but it was expensive and we never ended up going there. But I LOVE kids made/painted/created things. So when I was looking for a place near where we are now and my Google search came across the Alex Toys Paint Porcelain Party
 for much less than getting in a car and driving out to a place to pay more money for the pieces, I ordered it! (Yes, I ordered my own Mother's Day gift.)
 The set comes with a mug (not large, but not tiny,) a small yellow vase, a small heart shaped cup and saucer set, a shiny silver painted frame and heart jewelry box. It also comes with an acceptable range of color paints, but only two paint brushes. All the pieces but the frame should be put in the oven after at least 24 hours of drying to set the paint and make it water-proof (though you still have to hand wash the dishes.) It made a stink when I opened the oven door, but the hood vent took care of it, and it wasn't overwhelming, even to my pregnant nose.
Both boys wanted to paint the mug, though Early Bird agreed to paint the vase. He decided he was going to paint it like a rainbow.
 Builder Boy used the same colors at the same time as Early Bird, and ended up painting a red suspension bridge and a green tree on my mug.
  Principal Daddy spent a lot of thought and time on the tea cup and saucer.
 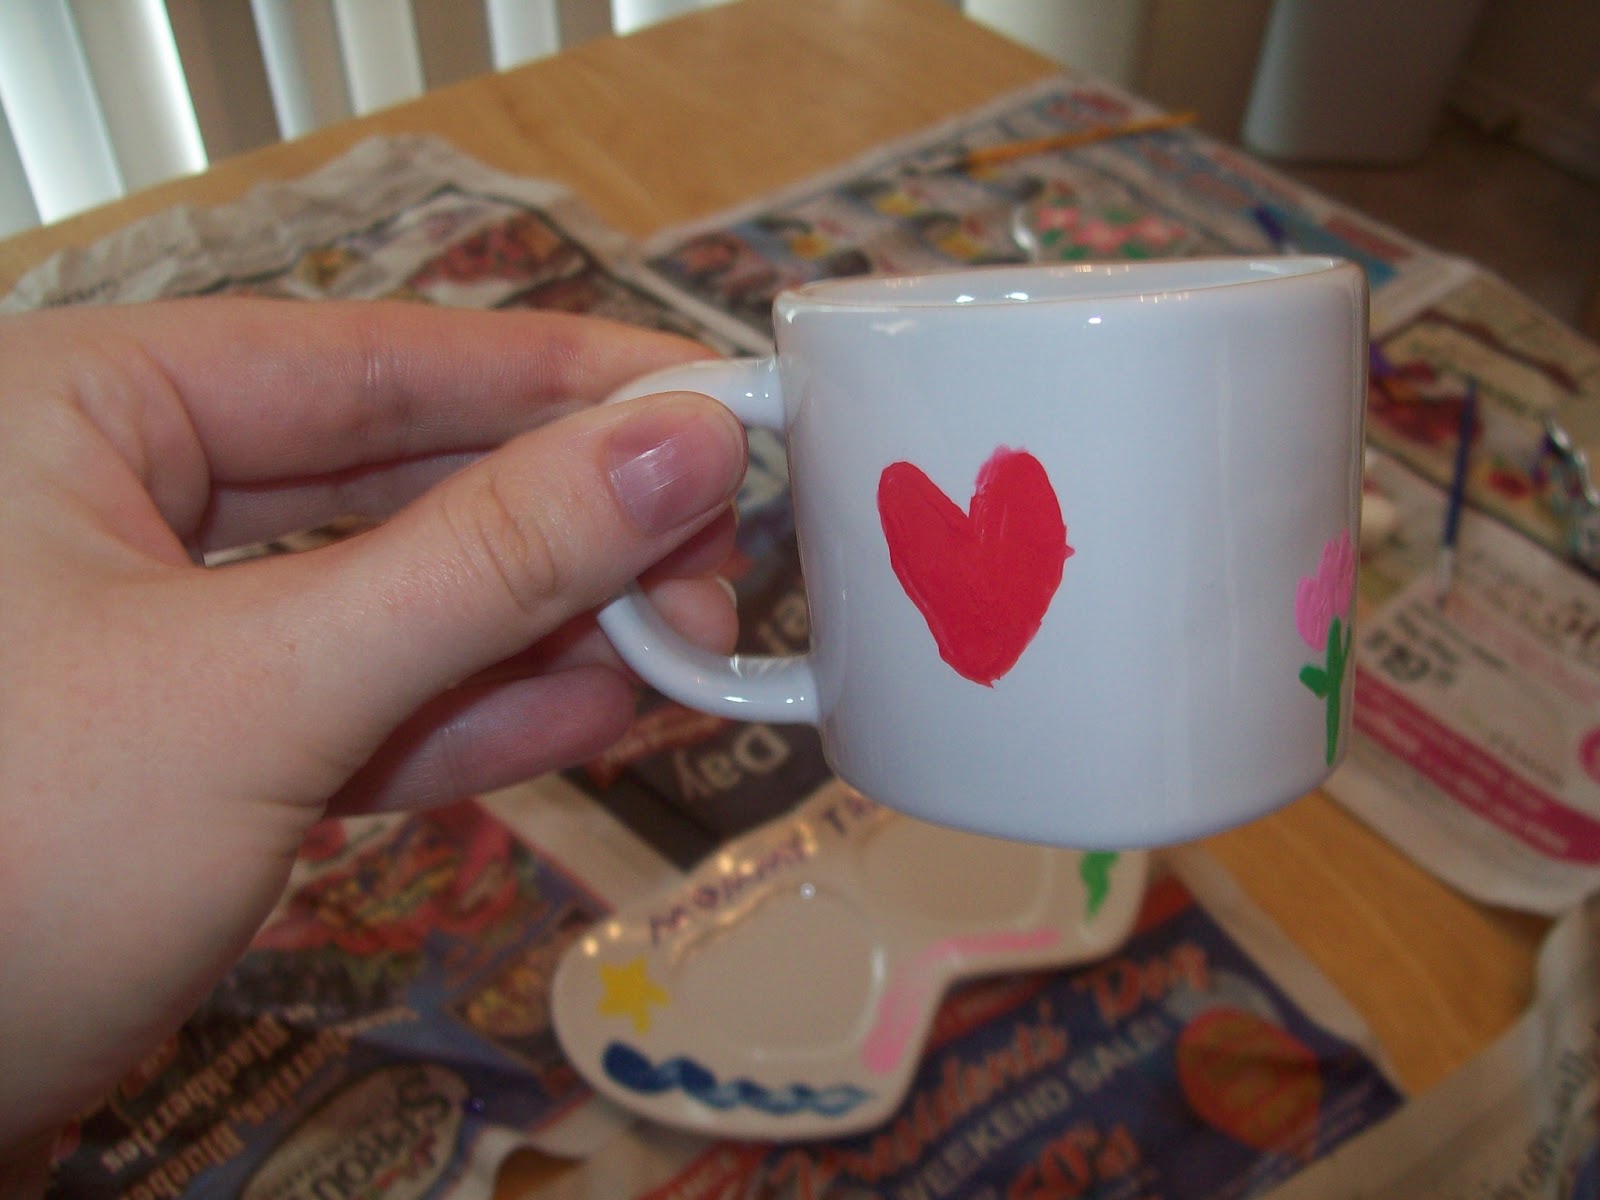 |
| Showing the scale of the teacup |
I wanted to paint, too, so I painted the jewelry box.

I am very happy with the quality and variety of the pieces available with this kit. It was easy, fun, perfect for kids, and much less expensive than a pottery painting shop. I recommend it!

Afterwards Builder Boy came and told me that I was going to get a special present from him: Special Mother's Day Cuddles! It was a really wonderful Mother's Day.
____________________________________________________________________________
I did not get paid for this review, all opinions are my own. The picture of the box and the name of the product are Amazon Affiliate links. Thanks to you guys, I finally got my first $11 from Amazon a little while ago!
Wednesday, September 19, 2012
Color Lab
Today was an Art Day! Thanks to a recommendation from the Teaching My Baby to Read blog I bought 123 I Can Paint! on Amazon.com. It has 6 painting activities to teach kids simple color concepts and painting techniques. The first activity is "Mix It Up" that makes an ocean scene and teaches mixing red, yellow, and blue to make orange, green, and purple.
Here's how they turned out:
 Builder Boy already knows what primary colors mix to make what secondary colors, but he had fun doing it anyway. Early Bird knows his main colors, but this was the first time talking about mixing some colors to make others. So while we were waiting for the paint to dry we did "Color Lab" which is something I had done with Builder Boy before, but it had been a while.

I put water in some small glass jars and put food coloring drops in each, making red, yellow, and blue water. Then I gave the kids larger jars for them to combine the "starting colors" in. Builder Boy knows they are called "primary colors," but so Early Bird could understand I also called them the "starting colors." That came in handy when he tried to mix different colors to "make yellow." It also helped having the primary/starting colors in the small jars and having them pour into the larger jars so that the secondary/mixed colors were "bigger." After we covered all the color combinations I let them play and mix with new water for a while. Early Bird was very excited about making brown, and he kept trying to add yellow to orange to make it.
 Once we had cleaned up I put on the Blue's Clues episode about mixing colors (Season 5, Episode 2.) Builder Boy already had all the colors on it memorized, but it was still good review for him. Early Bird had watched it before, but I don't think he understood the mixing concept until today. The Blue's Clues episode also goes over the tertiary colors. It calls red-orange vermilion, yellow-orange marigold, yellow-green chartreuse (which was Builder Boy's favorite color for a long time after seeing that episode for the first time, and don't you mistake it for green!) blue-green aqua-marine, blue-purple violet, and red-purple magenta. However you can't really make them with colored water, as the distinction really isn't there.
Added later: Another way to mix primary colors into secondary colors: Koolaid ice cubes in Sprite!
_________________________________________________________________________________ Be aware that this is a thin book, only 6 lessons and 22 pages. I didn't pay attention so I was surprised when it arrived in the mail, but I still think it's worth the $5.95 (if it's part of a free-shipping order.)
For older children, Jenny over at Teaching My Baby to Read did an awesome color Osmosis Experiment that can also be used to teach mixing colors.
on Amazon.com. It has 6 painting activities to teach kids simple color concepts and painting techniques. The first activity is "Mix It Up" that makes an ocean scene and teaches mixing red, yellow, and blue to make orange, green, and purple. Here's how they turned out:
 |
| Builder Boy's Ocean Painting |
 |
| Early Bird's Painting (updated with orange fish) |
 |
| My Picture (the yellow and the red were suppose to blend with the blue) |
 Builder Boy already knows what primary colors mix to make what secondary colors, but he had fun doing it anyway. Early Bird knows his main colors, but this was the first time talking about mixing some colors to make others. So while we were waiting for the paint to dry we did "Color Lab" which is something I had done with Builder Boy before, but it had been a while.
I put water in some small glass jars and put food coloring drops in each, making red, yellow, and blue water. Then I gave the kids larger jars for them to combine the "starting colors" in. Builder Boy knows they are called "primary colors," but so Early Bird could understand I also called them the "starting colors." That came in handy when he tried to mix different colors to "make yellow." It also helped having the primary/starting colors in the small jars and having them pour into the larger jars so that the secondary/mixed colors were "bigger." After we covered all the color combinations I let them play and mix with new water for a while. Early Bird was very excited about making brown, and he kept trying to add yellow to orange to make it.
 Once we had cleaned up I put on the Blue's Clues episode about mixing colors (Season 5, Episode 2.) Builder Boy already had all the colors on it memorized, but it was still good review for him. Early Bird had watched it before, but I don't think he understood the mixing concept until today. The Blue's Clues episode also goes over the tertiary colors. It calls red-orange vermilion, yellow-orange marigold, yellow-green chartreuse (which was Builder Boy's favorite color for a long time after seeing that episode for the first time, and don't you mistake it for green!) blue-green aqua-marine, blue-purple violet, and red-purple magenta. However you can't really make them with colored water, as the distinction really isn't there.
Added later: Another way to mix primary colors into secondary colors: Koolaid ice cubes in Sprite!
_________________________________________________________________________________
Be aware that this is a thin book, only 6 lessons and 22 pages. I didn't pay attention so I was surprised when it arrived in the mail, but I still think it's worth the $5.95 (if it's part of a free-shipping order.)For older children, Jenny over at Teaching My Baby to Read did an awesome color Osmosis Experiment that can also be used to teach mixing colors.
Subscribe to:
Posts (Atom)
